|
Mainline Service & Interchange Module |
|
THE
“Mainline Service & Interchange Module” occupies one shelf of an existing
built-in set of six 10-ft. long shelves in the former workshop, the shelves
being about a foot apart. I installed fluorescent lights on the underside of
the shelf above the layout where the fixtures are not visible, but
illuminate the module suitably. Because of the length, I found that the
schematic diagram, although accurate, was too compressed in size to be
helpful in conducting train operations with a portable controller. |

click to enlarge display |
|
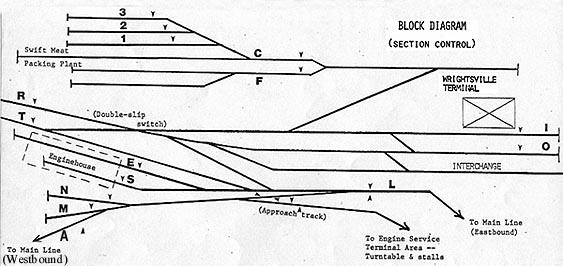
So I built a
display panel across the top of the module, showing all of the trackwork in
position directly above the actual track it depicted (compressed in height,
but not length). This long track diagram panel above the layout became a
highlight of the H&O Division which captured immediate attention and comment
of visitors when they entered the room. (Five separate photographs were made
and merged to create the panoramic image shown above). |
| - |
Legend:
A = Lead to westbound main line
M = Maintenance holding track
S = Enginehouse short stall
T = Tank car storage area
F = Front yard
L = Lead to eastbound main line |
L = Lead to eastbound main line
N = Nearside maintenance track
E = Enginehouse extended stall
R = Layout “Ridge” protected area
C = Classification yard +Tracks 1, 2, 3
I & O = Wrightsville Inside & Outside house tracks |
|
Note: The Interchange Track and the Approach Track
to the service area and turntable
stalls are labeled but are not assigned letter designations on
this schematic diagram.
The small arrowpoints ( and / or and / or
 ) designate electrical block
gaps. ) designate electrical block
gaps. |
|
|
|
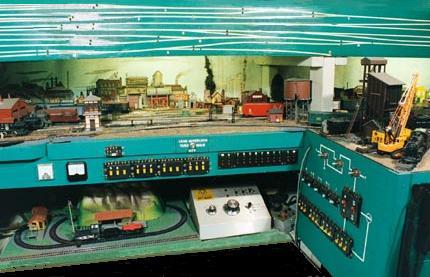
This
illustration depicts how the long "shelf layout" of the Mainline
Service & Interchange Module fits in between the overhead display
panel and the control panels for the module, with a portion of the
turntable service area and its controls to the right. (This photo
shows about half of the "shelf" area; the reflections of light on the
overhead panel are from the floodlights used to make the image).
|
|
|
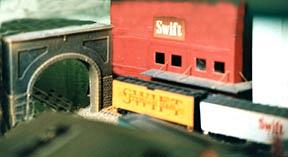
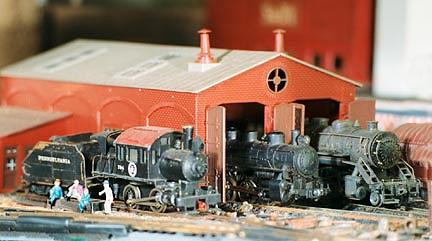
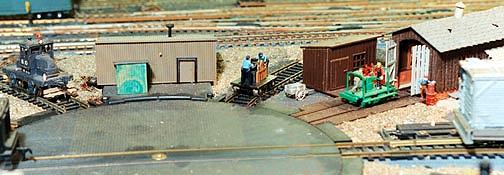
While
three steam locomotives await servicing, the engine house crew is
eating lunch (lower left). |
|
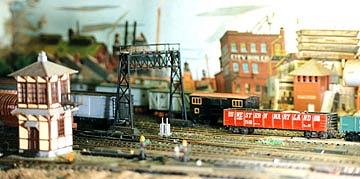 |
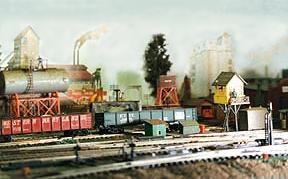
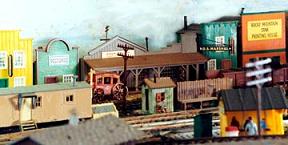
Left:
An industrial section view with two different style switch towers and a
signal bridge visible, as well as some H & O maintenance-of-way cars on
the back sidings. |
|
|
|
|
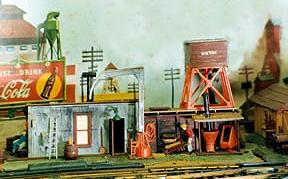
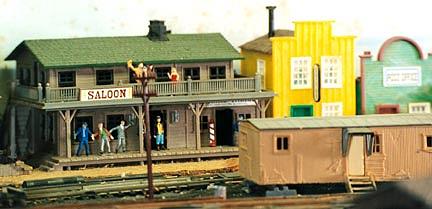
Things seem to be going normally with the gang at the saloon, as well
as with the folks on the second floor. |
|
|
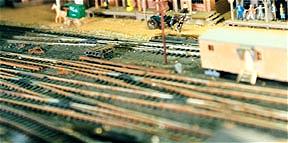
Right:
An example of the extensive trackwork contained in the former
switching yard which now comprises the "shelf area" of the "Mainline
Service & Interchange Module." |
|
|
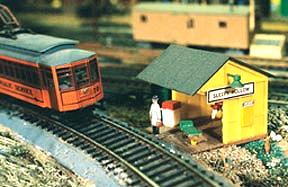
Left:
The interurban trolley from the H & O Hilton Module approaches the
Sleepy Hollow stop to board and discharge passengers. The next
station stop on its return to "home base" will be at South Buffalo
Junction adjacent to the Bison Yard. |
|
 |
|
The
daily stagecoach has arrived in the center of town and will soon
depart on its return trip. Note that the newspaper office is next to
the Marshal's office, so it should have no excuse for missing out on
any of the latest news. |
|
|
The
Wrightsville diorama, also pictured below as a free-standing unit,
has been returned to its place on the "shelf layout," and careful
study will reveal several parts of that little section to be visible
in this view. |
|
|

|
This
little diorama of the "Wrightsville" Terminal, as well as the
all-metal Monon box car, are more than 30 years old, and have now been
made a part of the Mainline Service & Interchange Module on the
NORMANED RAILROAD's H&O Division. The diorama was the author's
first-ever attempt at creating a scene in HO-scale, and sat gathering
dust for years on a shelf overlooking the NN&T's main O-gauge layout.
The photograph was taken in an outdoor garden. |
|
|
Enginehouse Service Terminal Area - Turntable & Stalls
| |
Legend:
1 = Approach Track (from Mainline Module)
2 = Coaling tower
3 = Servicing tracks
4 = Snowplows
5 = Repair shop
6 = Handcars
7 = Utility tracks
8 = Wheel track
9 = Velocipedes |
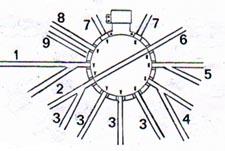 |
Track diagram of the enginehouse service and turntable stalls with
electrical wiring depictions removed. |
|
|
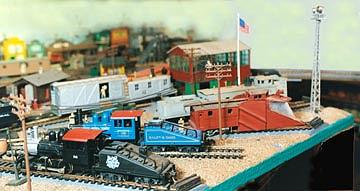
General view of the turntable and stalls extension of the Mainline &
Interchange Service Module (this picture is taken from the same
approximate orientation as the diagram above). |
|
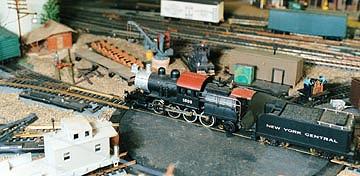 |
Left:
New York Central RR 2-8-2 "Camelback" No. 1608 with its tender waits to
be "turned" into a maintenance stall. |
|
|
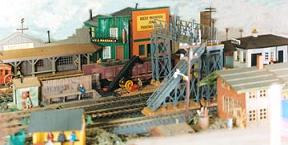
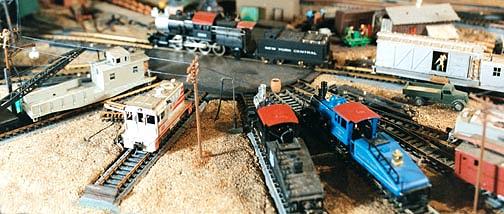
Right:
Clockwise from top: a "Galloping Goose" type freight unit (for
consignment of less-than-carload lots), two railroad snow plows (rotary
and regular wedge), and two yard switch engines which appear identical
except for their livery colors (a blue B&O RR No. 18 and a black New
Haven RR No. 98). The eastbound mainline track can be seen curving away
from this module at center right in the picture (behind the floodlight
tower). |
 |
|
|
As
the "tail end" of the tender of the last locomotive to be serviced
this day leaves the turntable, H & O work crews start putting
away their equipment for the night ahead. |
|
|
Activity out on the Mainline
 |
|
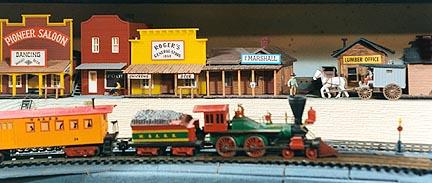
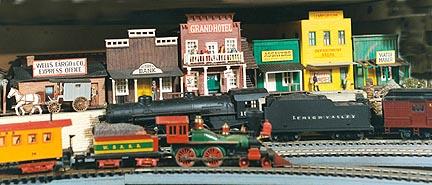
In the top photo, a reproduction of the famous "General"
locomotive of the prototype Western & Atlantic RR pulls a period
car with passengers on a tourist excursion past the old Western
town located at the east end of the H & O Division's mainline. In
the photo below, both the "General" and the horse and driver of
the little van have made their way to the next section of town as
the Lehigh Valley RR "Black Diamond Express" whizzes by on an
adjacent track. |
|

|
Simulated poured concrete pillars support "HighBridge" which
carries H & O Division trains between the Mainline Service &
Interchange Module (offstage right) to Bison Yard at the left of
the truss bridge over which this westbound B&O Railroad's 2-8-2
Mikado with its freight drag is about to cross. These long bridge
pillars extend to the floor of the room, allowing a "duckunder"
entrance to the layout.
(However, it appears someone may have thrown the wrong track
switch someplace along the line, since the scenic background seems
to strongly resemble the wild surroundings somewhere in the
western part of Norway).
|
|
|
|
| Epilogue |
|
As the
text and illustrations in these latest sections indicate, the cosmetic
repair and revival work on the NORMANED
RAILROAD
and its divisions has been accomplished. Although operation also has been
restored to most areas, there does remain some electrical trouble-shooting
and track improvements to be worked on – but that was true before the
“abandonment,” and is always true on most model railroads. We shall continue
to update this web site from time-to-time to correct errors made and report
enhancements. So, stay tuned and visit again soon as a passenger on the NORMANED. |
|
--Norm Wright |

|
[ Home ]
|

|